

Tutorial: Apply Alarms
With eDESIGN it is possible to use prefabricated components. The component Alarms makes it relatively easy to trigger and acknowledge alarm states.
Definition of alarms
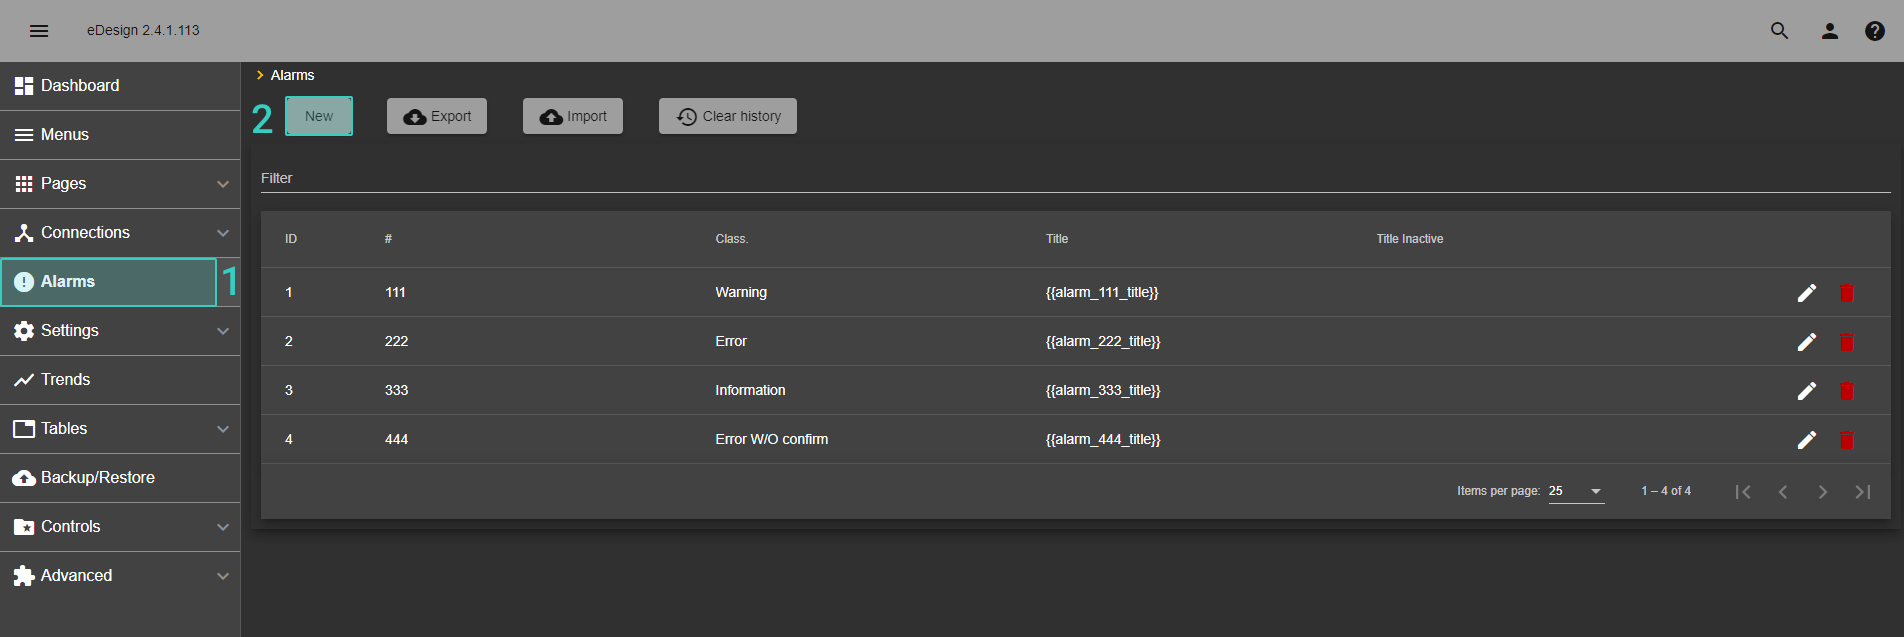
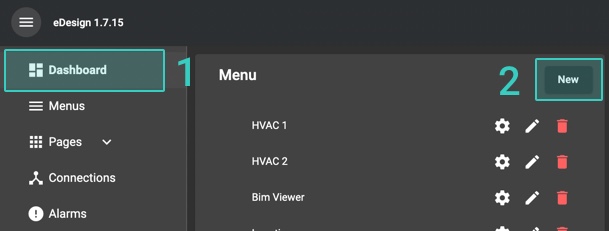
- Open the menu and go to the Alarms menu item
- A button appears in the upper left corner that says "New". Click on it and create a new alarm.
Configure alarm
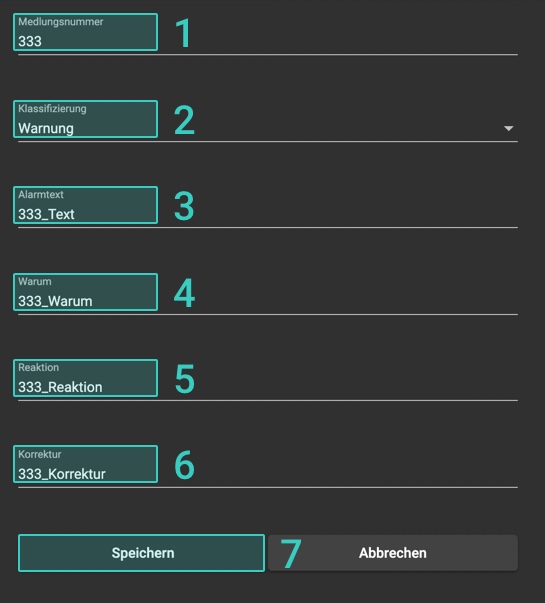
- Assign message number
- Select classification
- Enter alarm text (e.g. compressed air missing)
- Enter why (e.g. sensor B26.6)
- Enter reaction (e.g. machine stop)
- Enter correction (e.g. check sensor B26.6 for function)
- Save new created alarm
Create alarm in Codesys
PART 1:
Make the alarmingPrg (base program that takes care of initializing and observing the alarms changes). Important in current implementation is that the path of alarmingPrg is exactly “Application.alarmingPrg“.
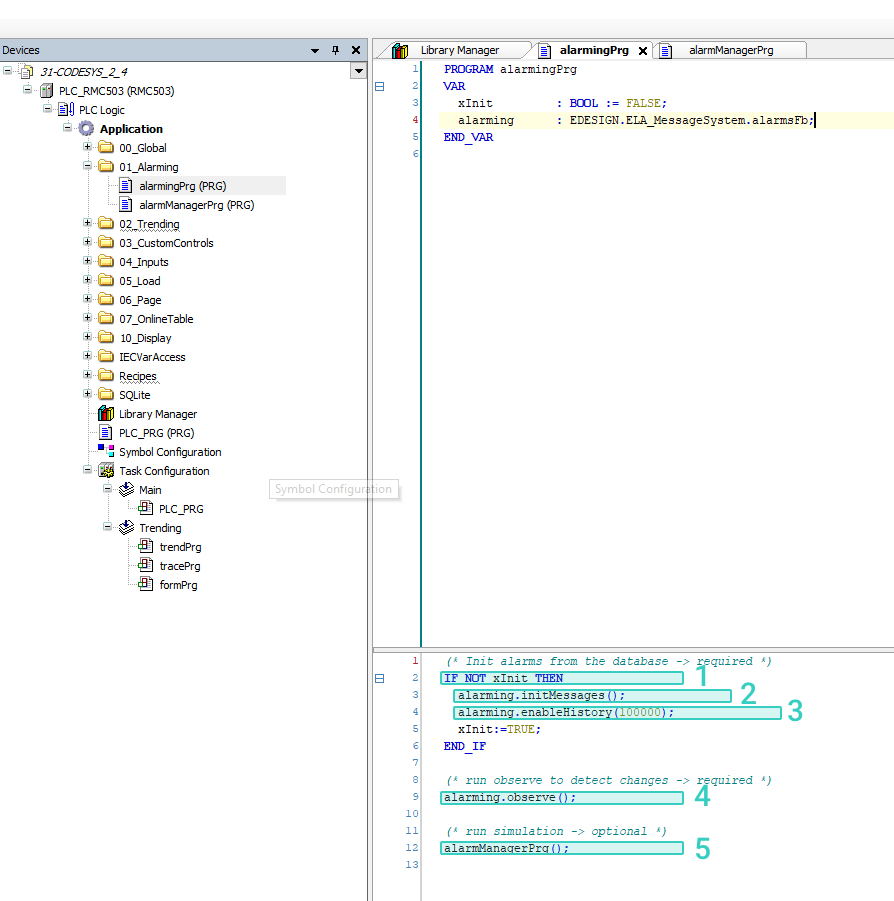
- Condition will be TRUE only on first cycle and will allow us to init the alarms
- This method call will initialize alarms definition from the database which was previously defined in STEP 1 or STEP 2 (Definition of alarms)
- Enable alarms history and set the cyclic buffer length to 100 000. The bigger the buffer is the larger will be the size of the history DB.
- Observe for alarm changes. This needs to run every cycle to check for changes and propagate them to HMI.
- Run alarm manager program for controling the behaviour of every alarm individually. See other screen for details.
PART 2:
Do not forget to adjust the Symbol Configuration. Only few variables are needed for the HMI to be read, but must be there. Otherwise the HMI will have no information about alarm changes in the PLC code.
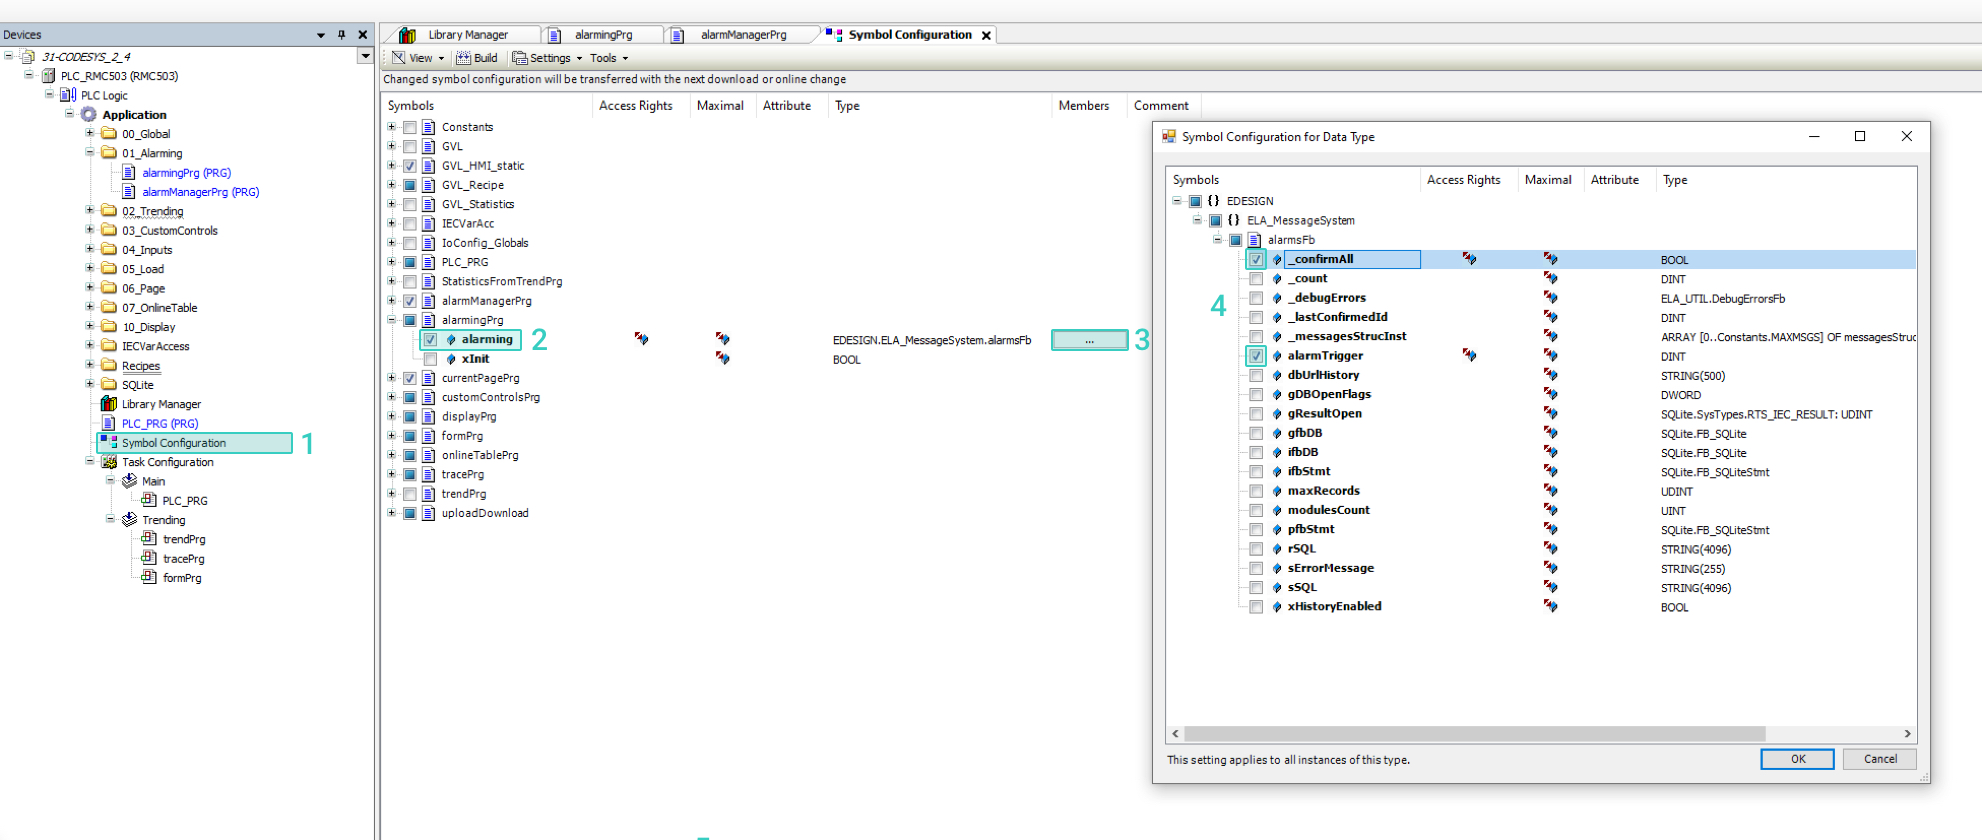
- First go to Symbol Configurations
- Under "alarmingPRG" select "alarming"
- For further details select the three points
- Publish only these 2 variables, more is not needed
PART 3:
Implementation of the individual alarm manager. Place where the conditions are defined.
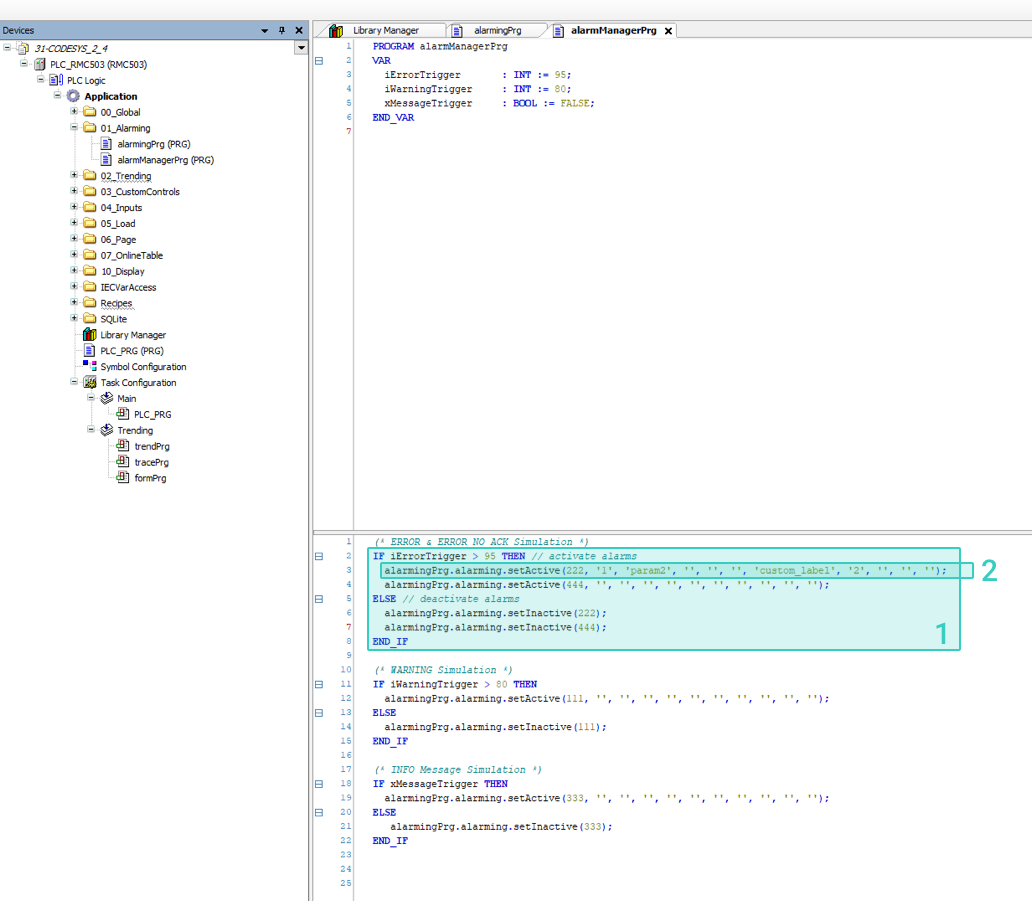
- Example of an implementation of 1 alarm management (2 in the example project) IF condition THEN activate alarm ELSE deactivate alarm
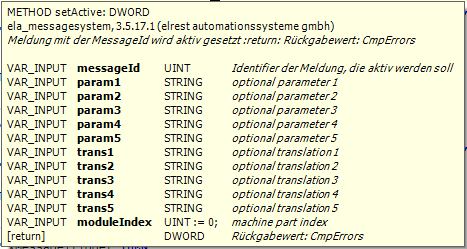
- setActive with parameters. First one in message id (msgld), which you can find in the alarms definition table
parameters 2-6 => params that can be passed into the alarm message title (explained in advanced alarming)
parameters 7-11 => translation that can be passed into the alarm messages title
parameter 12 (default 0, not present in the call) module id eDESIGN is prepared to have the same alarms on different modules
Integrate alarms
There are two options to view the alarms in eDESIGN:
Show alarm on the whole page
- Go to the Dashboard and create a new menu item for the front-end menu.
- Press "New" and create a new menu item.
- Assign title (displayed in the menu in the frontend)
- Specify Root
- If the menu item is not active, it is also not displayed
- You can specify an order
- Select icon for menu item
- Open subitem Components and select Alarms
- Save menu item
Go to the frontend and open the alarm page you have just created

- Acknowledge the messages
- The configured alarms that have been set appear here
Insert alarm on any page
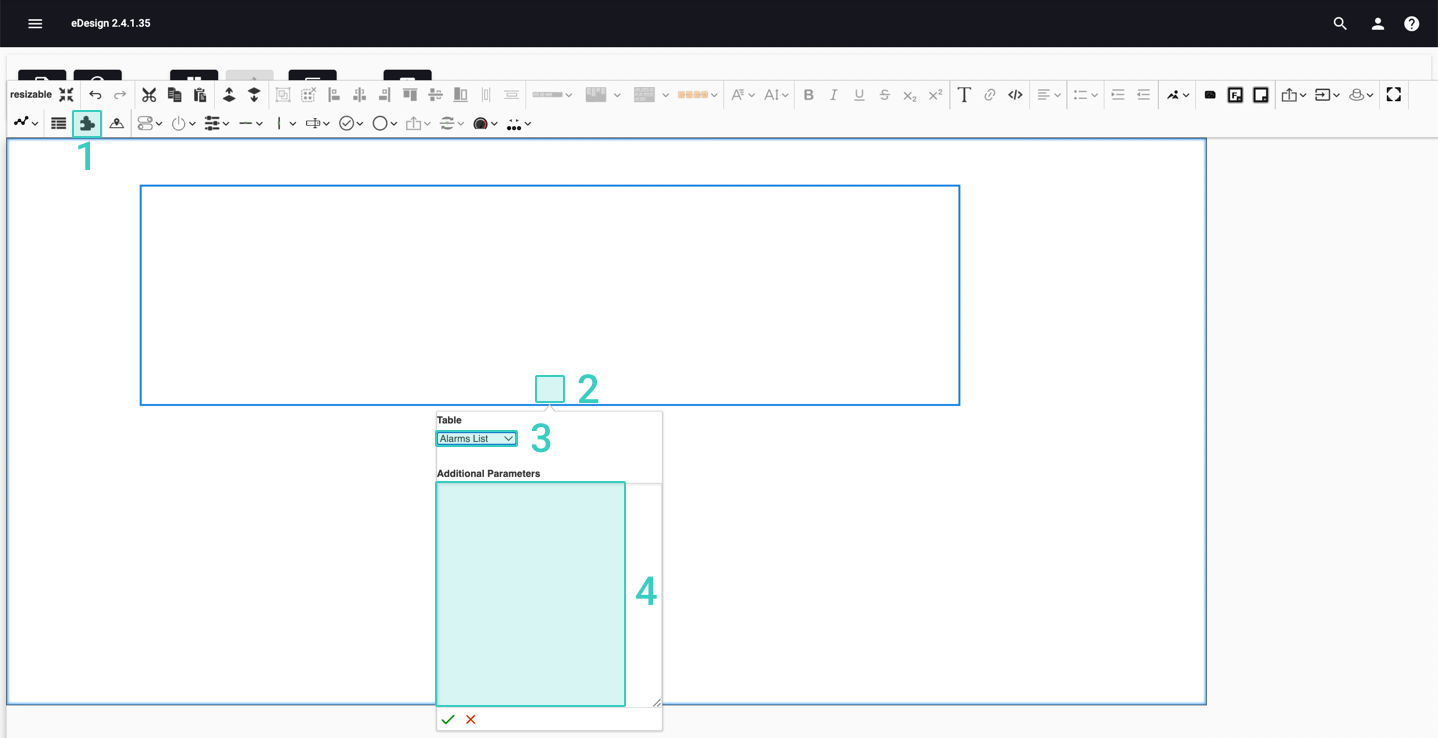
- Add the component from the toolbar to the page
- Click on Properties
- Select the alarm list
- Here you can enter additional parameters